Tutorial 00: Arduino Course Introduction
Getting Started
This Arduino Course is designed around extremely quick and simple-to-set-up circuits using an ArduinoTM board.
The first thing you should do in each lesson is set up the circuit!
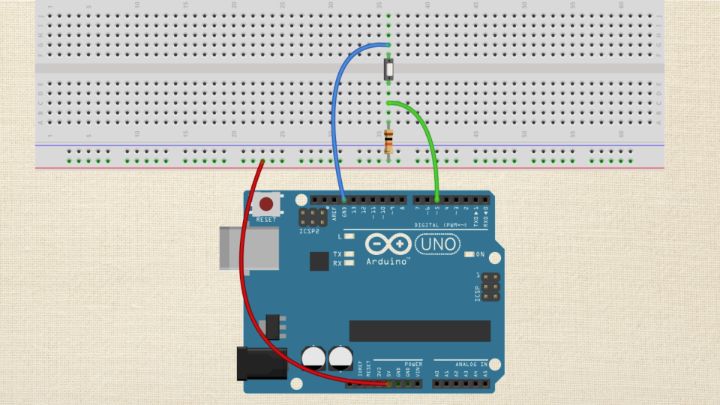
Creating the circuit should take you all of one to four minutes depending on the lesson. Each lesson begins with “Step-by-Step Instructions” to build the circuit. The written description is accompanied by a breadboard rendition of the circuit that will be useful as well.
At the beginning of each section, there is a list of all the parts required for the circuit in that section.
Once the circuit is created, load the code!
The circuit won’t do much until you have the brains of the Arduino programmed to execute the sketch (a sketch is simply the instructions written for the microcontroller).
There are two versions of the code file. One is for loading into the Arduino (the file extension is .ino) and the other is for printing a hard copy to refer to while you read the section (the file extension is .pdf).
Taking the extra step of printing the code for each section will be of great benefit to you while studying the programming in this book. It allows you to directly refer to the sketch while reading, saving time and providing you the code within the context of the entire program.
Mark up the paper with notes and thoughts, and use it as a reference to your studies.
Like I mentioned, all the code files are available downloading, however, almost every sketch example has been pulled directly from preloaded code that comes installed on the Arduino IDE, under File > Examples.
You may notice a few changes between the code in this module and the code preinstalled on the IDE, but, generally speaking, they are duplicates.
Most of these programs were crafted by the founders of Arduino and are great examples of specific concepts of code.
Once the sketch is running, read the code!
The code is included in each lesson. Do your best to understand the program before you read about the new functions being presented. If you are lost, no sweat, it is time to start reading.
If you think you understand the sketch from reading the code – then skip the text and start hacking! There is no better way to learn how something ticks than to work with it.
This is how I generally approach a new sketch after I have read it and think I get the gist –
- Make some changes.
- Make a prediction about the outcome of my changes.
- Validate my predictions by running the sketch and observing the circuit’s behavior.
If it works as planned – I am a genius! Usually, my predictions are off – but the actual behavior of the circuit serves to clarify my understanding. Rinse and repeat.
If you are the kind of person who likes to read through the full lesson before you get your hands dirty, that is fine too. I have tried to make the description of each program as user-friendly as possible – but the fact remains – it can be slightly technical. Don’t let the fact that you might not understand something 100% stop you from experimenting with the sketch. The more you code, the better you will code – real understanding takes time to sink in.
Each example will focus on a single aspect of the Arduino platform – which makes them great tools for learning. Many lessons will build on previous examples and circuits – in multiple cases you will use the same circuits but for different sketches.
You might even think some of the examples are too basic. If this is how you start to feel, then it is time for you to make changes to the code and push the envelope of your understanding.
At the end of each lesson, there is a “Try On Your Own” section, where you are presented with a challenge. Take on each challenge and make sure you save them for future use – they might come in handy some day.
Arduino Course Organization
This Arduino Course is composed of video and written tutorials. Each tutorial is built with sections, each section has the following subsections:
The Arduino Code
Throughout the lessons, you will see gray text boxes. These are exclusively for computer code or code explanation. This is the Arduino code (called a sketch) that the module will be covering in depth. It is a good idea to read through this prior to starting the section.
You Will Need
This section lists all the components required for the circuit. The ArduinoTM board and the USB cable that attaches the board to your computer as they are required for every project. Also, a solderless breadboard is used in nearly every module and thus not listed.
Step-by-Step Instructions
This section guides you through circuit setup and loading code onto your Arduino board. A picture of the completed circuit is also included. As you progress in the course, you may choose to skip the written instructions and just use the diagram to assemble the circuit.
Discuss the Sketch
This section describes in detail how the computer code is written. It is preceded by the full sketch that is used in the module. It will discuss variables used, functions used, and the overall structure and operation of the sketch.
Try On Your Own
This section has a short list of code and /or circuit modifications to practice. This is a very important part of the learning process. Take time to try and figure out solutions to all of these challenges.
The Arduino Community and Infrastructure
Arduino is a successful platform largely due to its active user community. I say community because people in a community interact and share and grow together, and that is very much what happens with Arduino.
You want to do a couple things as you begin learning to use Arduino. First, I recommend signing up for the Arduino forum.The forum is a great resource for finding answers.
Many of the questions you have will already have been asked on the forum. You can simply search through previous forum threads for an answer. Other questions may be unique to your current project.
Before posting a question on the Arduino forum do some homework and see if the answer isn’t already on the Arduino website. If you want a precise answer, ask a precise question.
For starters, include the code you are working with, the model of your Arduino board and the version of the Arduino IDE you are using.
Don’t be surprised if you encounter some feedback that is negative or useless…it happens. Just shrug it off and be thankful for the majority of folks who will be nice and helpful.
Parts
You may be interested in signing up for a Digi-Key, Mouser or Jameco account. These companies offer a plethora of electrical components that can be bought in small quantities.
I don’t recommend buying an electronics shop full of parts, but when the time comes, knowing where to turn for components makes it easier.
There are also several kit companies that offer Arduino specific accessories that may be helpful in designing projects. Adafruit Industries, Sparkfun, and MAKE: are great stores for these products, they offer great customer service and also provide bountiful tutorials.
People
I recommend finding a group of local people who share an interest in microcontrollers – many times you can draw from their experience. Meetup.com may have something listed near you, or if your town has a maker space/ hacker space this may be a source of interested folks. You could always just throw something out there yourself – you might be surprised who you’ll find.
These are all, of course, just recommendations. I enjoy working by myself in many cases – I am just such good company!
In any case, I hope you have fun exploring the world of micro-controllers and best of luck.
Best of luck!
-Michael James